IOS
- Getting started with iOS
- Learn Tutorial
- Overview
- Xcode Basics
- Create iOS Project
- Add UI Elements
- Views Hierarchy
- UIKit
- Define Views
- Access Subviews
- Action & Outlet
- Create iOS App with Multiple Views
- Add Navigation Controller
- How to Configure Table View
- Add iOS Table View and Data Source
- Sections & Headings
- Table View Delegate Behavior
- Custom Table View Cell
- Create iOS UI with Auto Layout
- Create Flexible Layouts with Stack Views
- Adaptive UI Using Traits and Size Classes
- Create a Tabbed Application
- Add a Toolbar
- Add Swipe Actions
- Add an Alert
- Images & Application Icon
- Launch Screen
- 3D Touch
- Accessibility
- ADDING A SWIFT BRIDGING HEADER
- AFNetworking
- AirDrop
- AirPrint tutorial in iOS
- Alamofire
- App Submission Process
- App Transport Security (ATS)
- App wide operations
- AppDelegate
- Application rating/review request
- ARC (Automatic Reference Counting)
- attributedText in UILabel
- Auto Layout
- AVPlayer and AVPlayerViewController
- AVSpeechSynthesizer
- AWS SDK
- Background Modes
- Background Modes and Events
- Basic text file I/O
- Block
- CAAnimation
- Cache online images
- CAGradientLayer
- CALayer
- Carthage iOS Setup
- CAShapeLayer
- Categories
- CGContext Reference
- Chain Blocks in a Queue (with MKBlockQueue)
- Change Status Bar Color
- Checking for Network Connectivity
- Checking iOS version
- CLLocation
- CloudKit
- Codable
- Code signing
- Concurrency
- Configure Beacons with CoreBluetooth
- Contacts Framework
- Content Hugging/Content Compression in Autolayout
- Convert HTML to NSAttributed string and vice verse
- Convert NSAttributedString to UIImage
- Core Data
- Core Graphics
- Core Location
- Core Motion
- Core SpotLight in iOS
- CoreImage Filters
- Create .ipa File to upload on appstore with Applicationloader
- Create a Custom framework in iOS
- Create a video from images
- Creating an App ID
- CTCallCenter
- Custom fonts
- Custom Keyboard
- Custom methods of selection of UITableViewCells
- Custom methods of selection of UITableViewCells
- Custom UITextField
- Custom UIViews from XIB files
- Cut a UIImage into a circle
- CydiaSubstrate tweak
- Debugging Crashes
- Deep Linking in iOS
- DispatchGroup
- Dynamic Type
- Dynamically updating a UIStackView
- EventKit
- Extension for rich Push Notification - iOS 10.
- Face Detection Using CoreImage/OpenCV
- FacebookSDK
- Fastlane
- FCM Messaging in Swift
- FileHandle
- GameCenter Leaderboards
- GameplayKit
- GCD (Grand Central Dispatch)
- Graph (Coreplot)
- Guideline to choose best iOS Architecture Patterns
- Handle Multiple Environment using Macro
- Handling URL Schemes
- Healthkit
- iBeacon
- IBOutlets
- In-App Purchase
- Initialization idioms
- iOS - Implementation of XMPP with Robbie Hanson framework
- iOS 10 Speech Recognition API
- iOS Google Places API
- iOS TTS
- Key Value Coding-Key Value Observation
- Keychain
- Load images async
- Localization
- Make selective UIView corners rounded
- Managing the Keyboard
- MKDistanceFormatter
- MKMapView
- ModelPresentationStyles
- MPMediaPickerDelegate
- MPVolumeView
- Multicast Delegates
- MVP Architecture
- MVVM
- MyLayout
- Navigation Bar
- NSArray
- NSAttributedString
- NSBundle
- NSData
- NSDate
- NSHTTPCookieStorage
- NSInvocation
- NSNotificationCenter
- NSPredicate
- NSTimer
- NSURL
- NSURLConnection
- NSURLSession
- NSUserActivity
- NSUserDefaults
- Objective-C Associated Objects
- OpenGL
- Passing Data between View Controllers
- Passing Data between View Controllers (with MessageBox-Concept)
- PDF Creation in iOS
- plist iOS
- Profile with Instruments
- Push Notifications
- QR Code Scanner
- Realm
- Resizing UIImage
- Rich Notifications
- Runtime in Objective-C
- Safari Services
- Security
- Segues
- Set View Background
- Simulating Location Using GPX files iOS
- Simulator
- Simulator Builds
- SiriKit
- Size Classes and Adaptivity
- Size Classes and Adaptivity
- SLComposeViewController
- Snapshot of UIView
- SqlCipher integration
- StoreKit
- Storyboard
- Swift and Objective-C interoperability
- Swift: Changing the rootViewController in AppDelegate to present main or login/onboarding flow
- SWRevealViewController
- UI Testing
- UIActivityViewController
- UIAlertController
- UIAppearance
- UIBarButtonItem
- UIBezierPath
- UIButton
- UICollectionView
- UIColor
- UIControl - Event Handling with Blocks
- UIDatePicker
- UIDevice
- UIFeedbackGenerator
- UIFont
- UIGestureRecognizer
- UIImage
- UIImagePickerController
- UIImageView
- UIKit Dynamics
- UIKit Dynamics with UICollectionView
- UILabel
- UILabel text underlining
- UILocalNotification
- UINavigationController
- UIPageViewController
- UIPheonix - easy, flexible, dynamic & highly scalable UI framework
- UIPickerView
- UIRefreshControl TableView
- UIScrollView
- UIScrollView AutoLayout
- UIScrollView with StackView child
- UISearchController
- UISegmentedControl
- UISlider
- UISplitViewController
- UISplitViewController
- UIStackView
- UIStoryboard
- UISwitch
- UITabBarController
- UITableView
- UITableViewCell
- UITableViewController
- UITextField
- UITextField Delegate
- UITextView
- UIView
- UIViewController
- UIWebView
- Universal Links
- Using Image Aseets
- UUID (Universally Unique Identifier)
- WCSessionDelegate
- WKWebView
- Xcode Build & Archive From Command Line
- XCTest framework - Unit Testing
IOS Add iOS Table View and Data Source
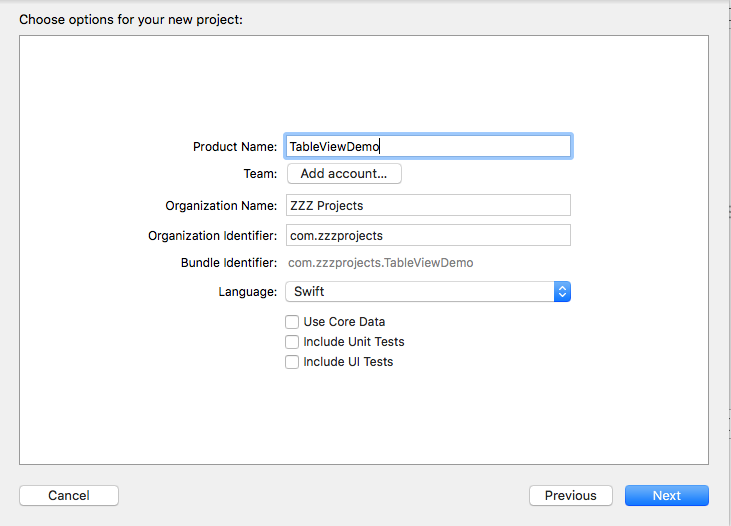
In Xcode, there is a project template option called the Master-Detail App, which already includes a configured table view, but it has a lot of other functionality as well. Here we will focus only on Table View, so let's create a new blank Single View App and call it TableViewDemo
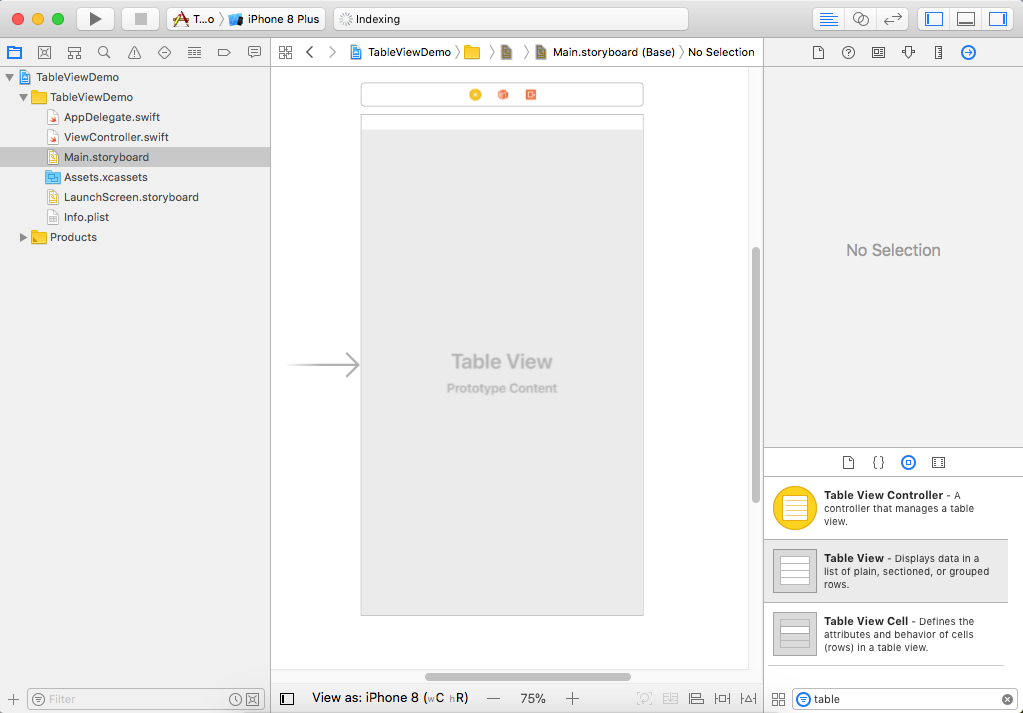
Once the project is created, go into Main.storyboard, and from the Object library find and drag a Table View.
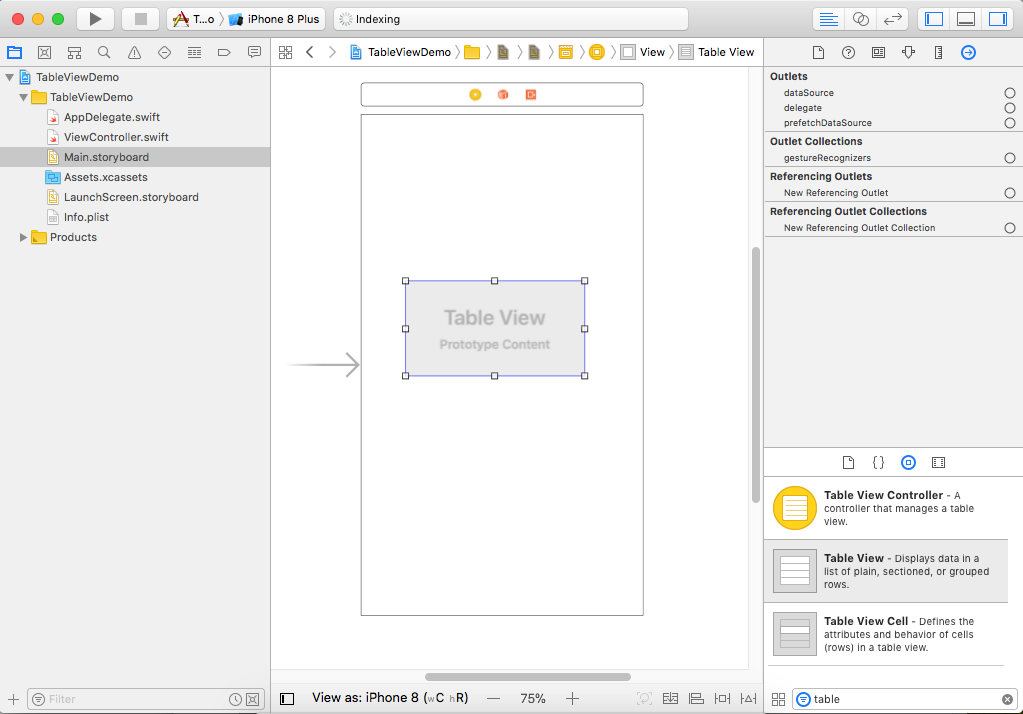
Now resize it to take up the full contents of the available space.
Right click on the table and you will see a popup.
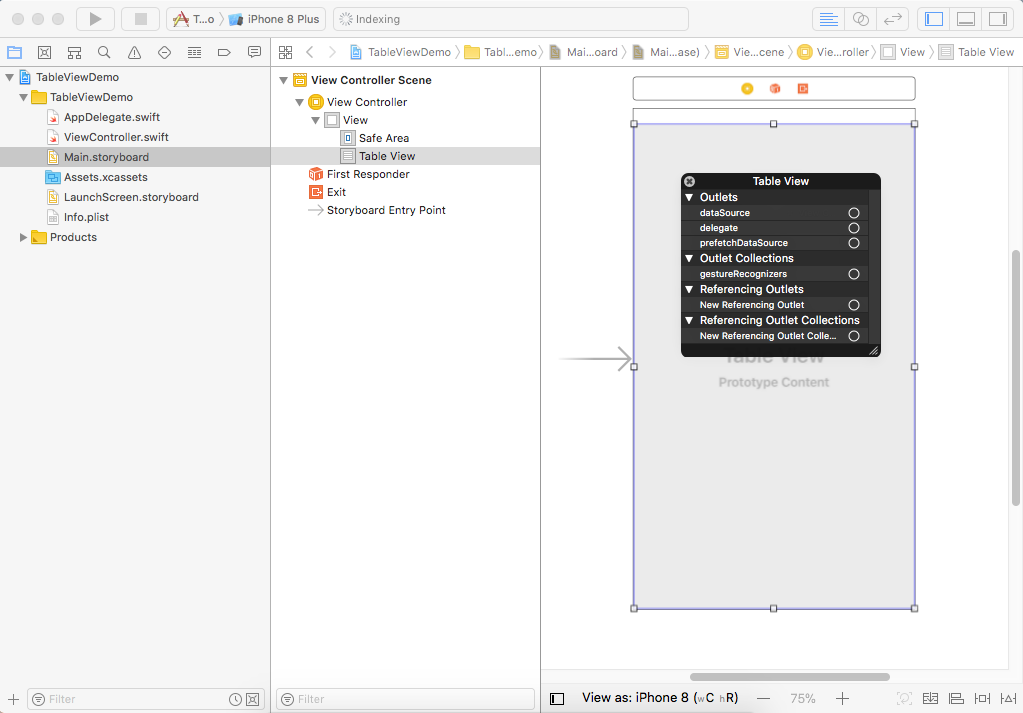
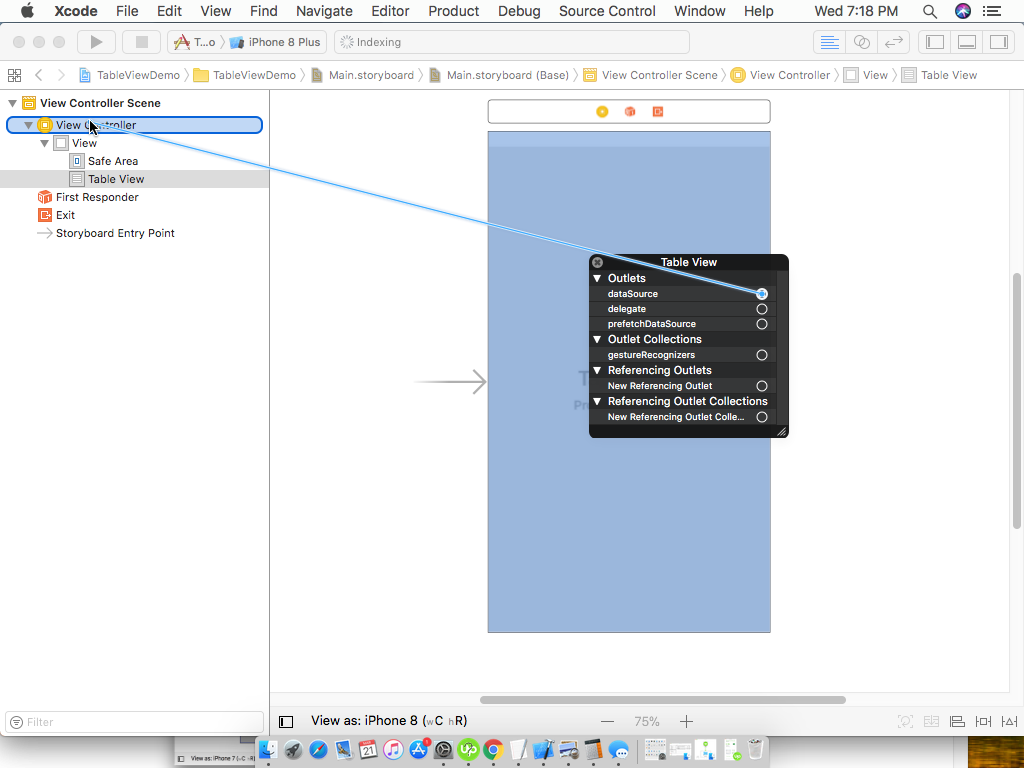
Click the circle beside dataSource and drag it over to the ViewController in Document Outline.
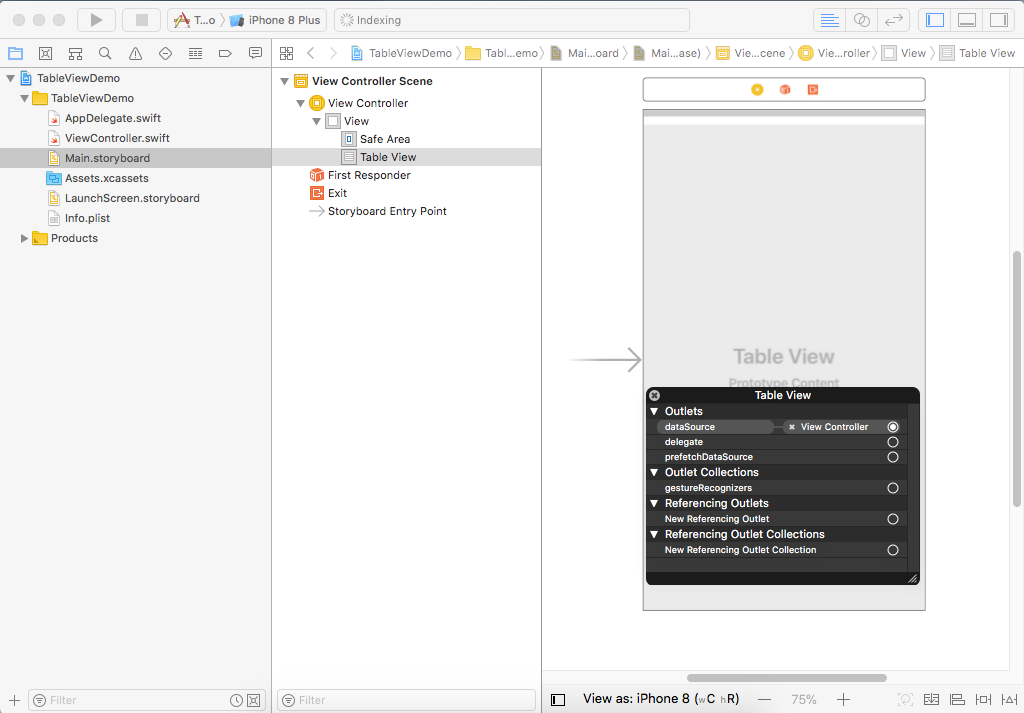
You should now see a filled circle, dataSource is now connected to ViewController.
The Table View will now expect to find its necessary methods in our ViewController class file, so let's go and write them.
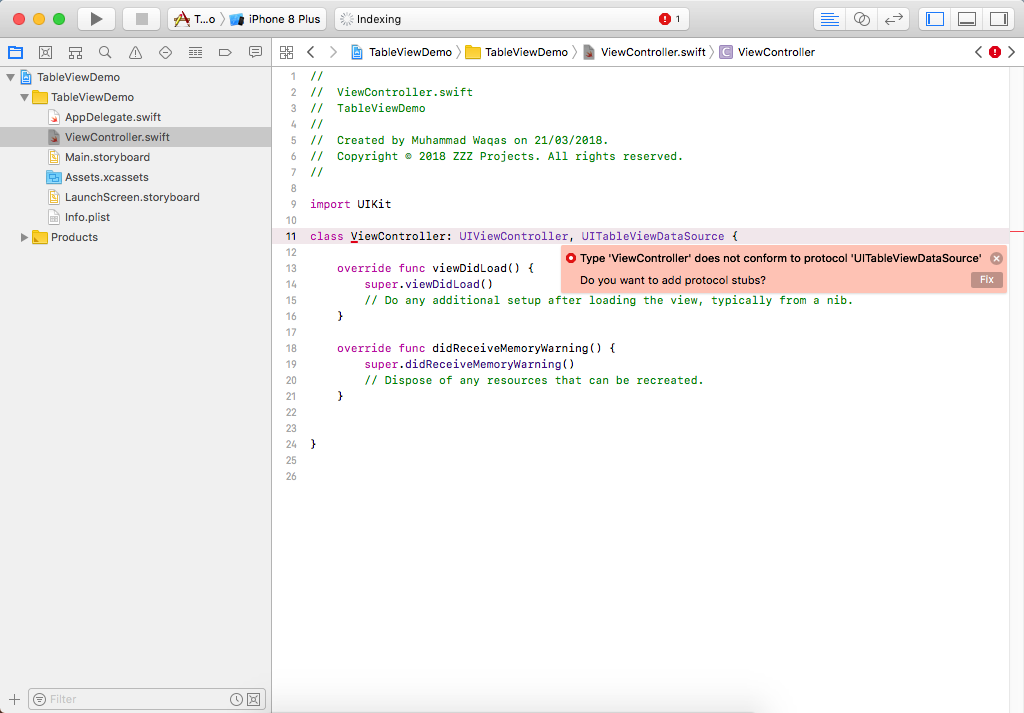
Open the ViewController.swift file, and in the class declaration, you can see that the class ViewController inherits from UIViewController class. After that add ", UITableViewDataSource" as shown below.
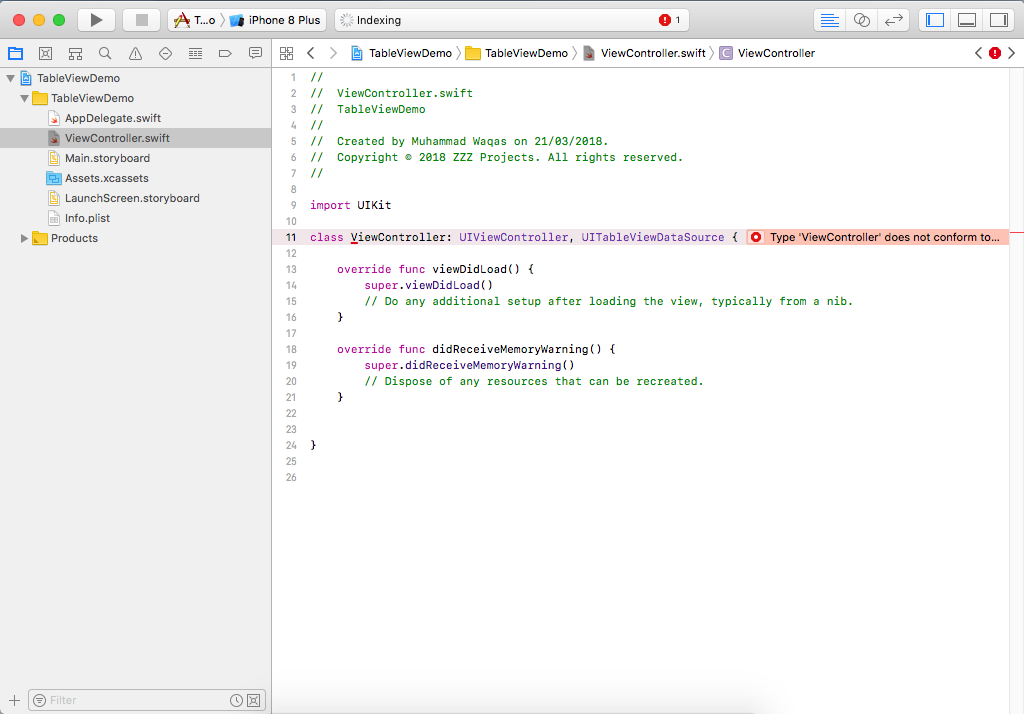
This is not a class name; it is a protocol name, a protocol being a formal list of methods and properties that we can volunteer to provide.
- You will also see an error Type 'ViewController' does not conform to protocol 'UITableViewDataSource'
- Because we need to provide at least a couple of required methods, if you want to look deeper at this protocol, go to the Protocol Reference, and you will see that there are eleven different methods that you can use when working with a table view.
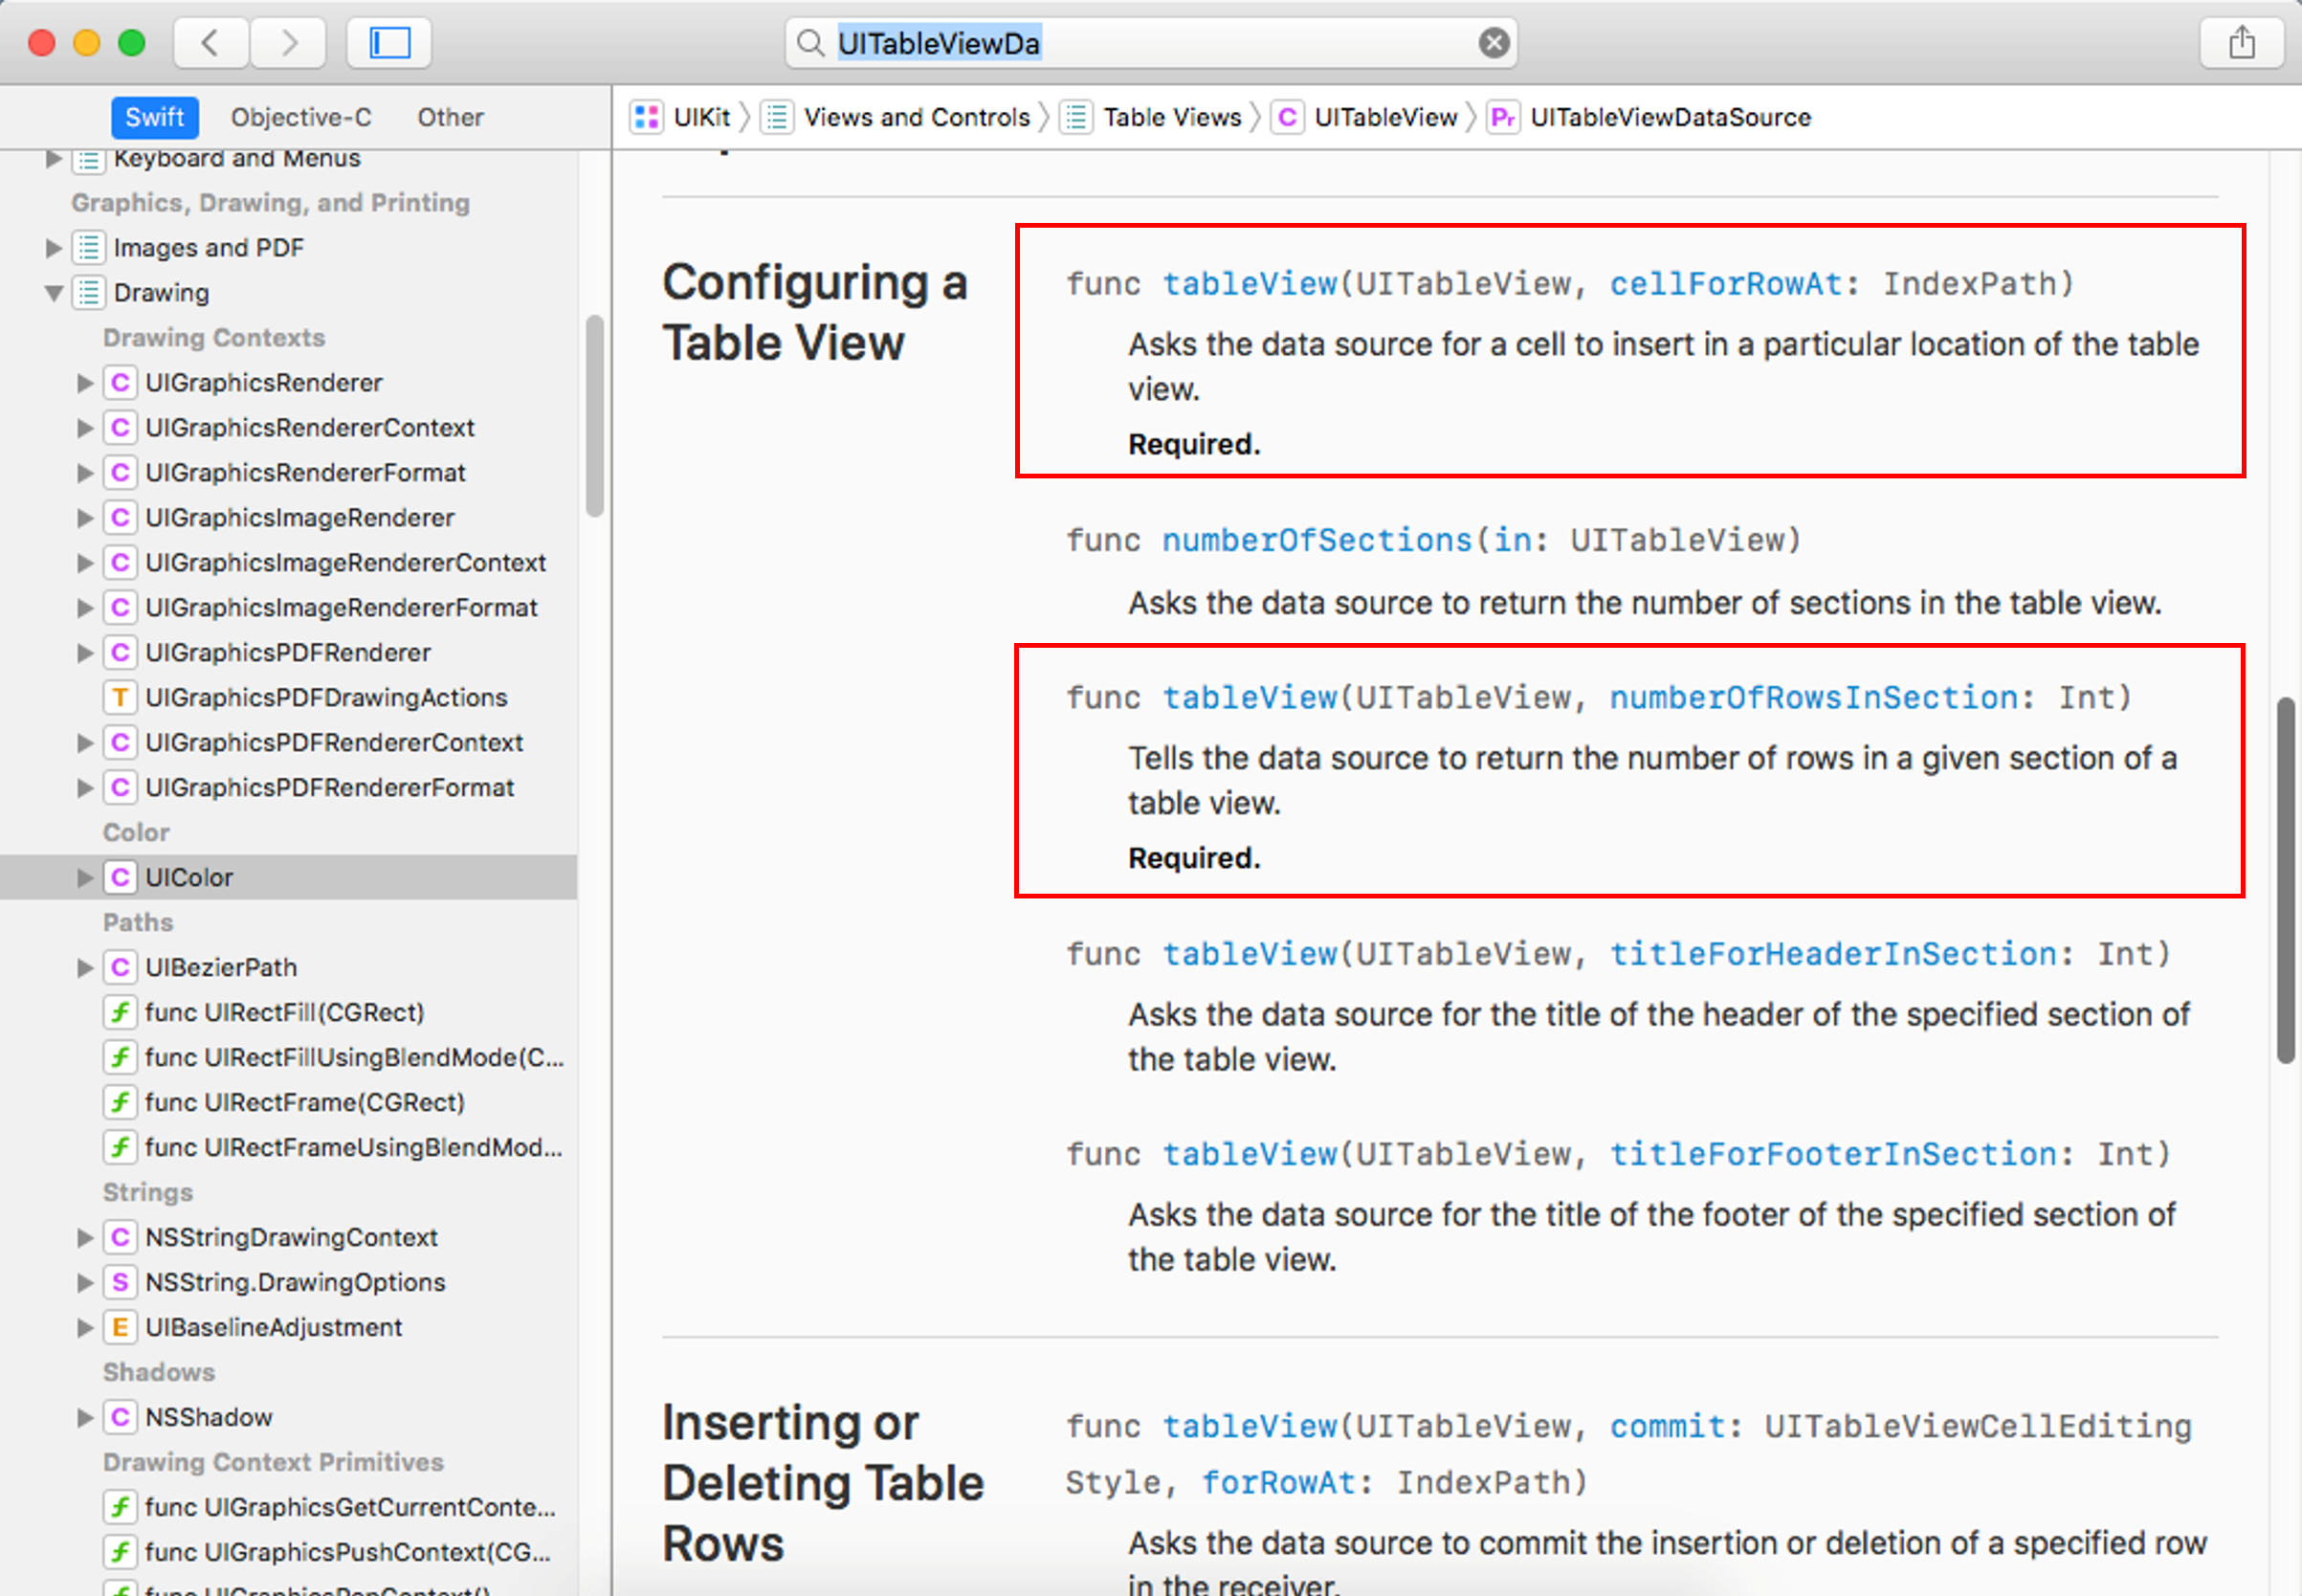
Now many of these methods are optional, in fact, only two of them are marked as required. The two methods marked as required are the tableView numberOfRowsInSection, and tableView cellForRowAt IndexPath.
So let's add the required methods by clicking the red circle in pop-up error and click Fix button.
Xcode now provides the stubs for our two required methods, numberOfRowsInSection, and cellForRowAt indexPath.
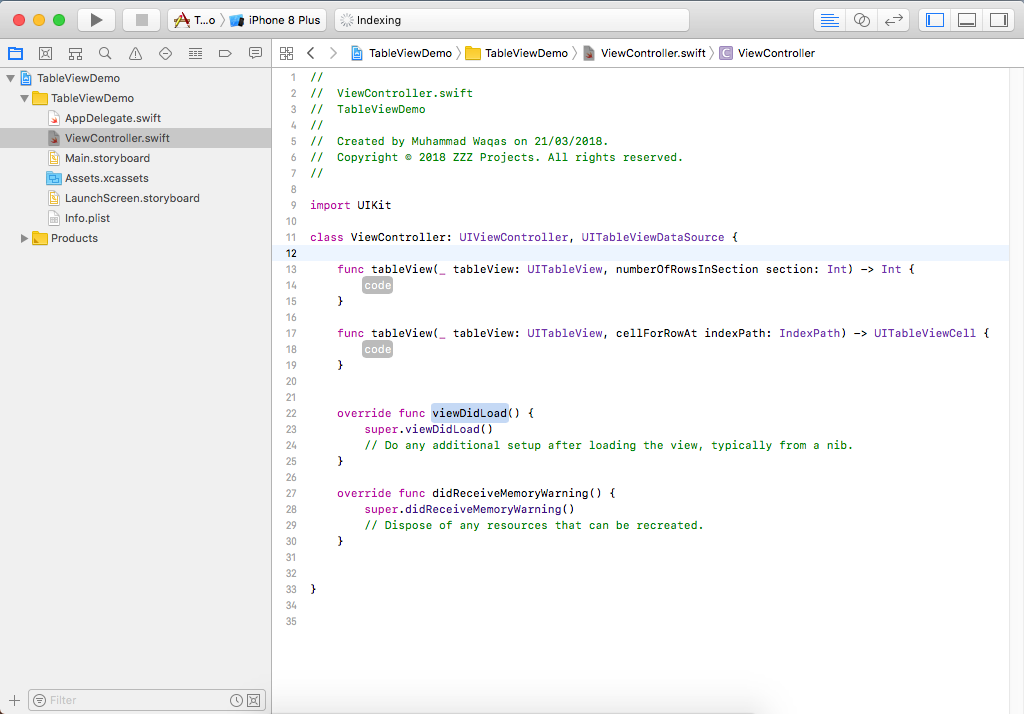
NumberOfRowsInSection will be called, and we just need to return an integer value of how many many rows we want in a section, so let's return 20.
func tableView(_ tableView: UITableView, numberOfRowsInSection section: Int) -> Int {
    return 20
}
In the next method, we need is cellForRowAt indexPath, providing the content of the cell for each row in the table view.
- This method will be automatically called once for each row
- Each time the method will be passed an indexPath parameter containing two integers, section number, and row number.
- We can ignore the section number at the moment because we don't have sections yet
- So, each time this method is called, we will need to return a cell object.
- Now a cell can be configured in a lot of different ways, but the default cell object contains a property called textLabel, so set its text property.
func tableView(_ tableView: UITableView, cellForRowAt indexPath: IndexPath) -> UITableViewCell {
let cell = UITableViewCell()
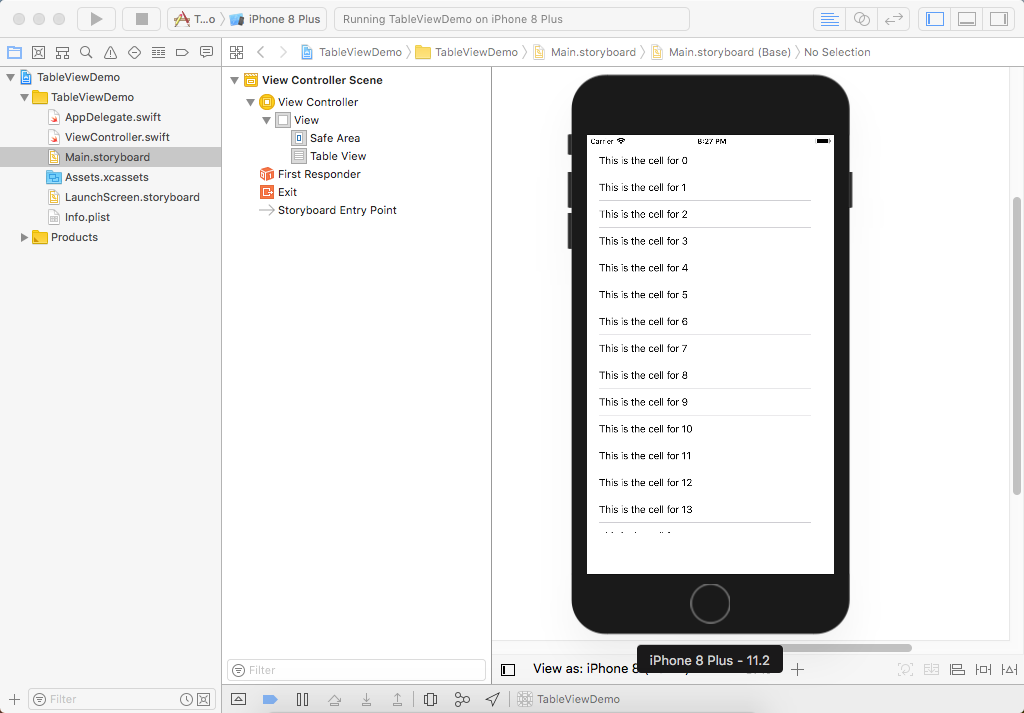
cell.textLabel?.text = "This is the cell for \(indexPath.row)"
return cell
}
Let's run your application.