IOS Add Swipe Actions
A swipe gesture occurs when the user moves one or more fingers across the screen in a specific horizontal or vertical direction. In our TaskList application we want to add a custom action to each row so we can swipe right to left, have a button appear, and choose the action to complete that task.
To mark a task completed or not completed, we have a simple struct to hold a task definition in a separate swift file.
import Foundation
enum TaskType {
    case daily, weekly, monthly
}

struct Task {
    var name : String
    var type : TaskType
    var completed : Bool
    var lastCompleted : NSDate?
}
In view controller, we have three arrays of tasks for daily, weekly and monthly tasks.
var dailyTasks = [
    Task(name: "daily task 1", type: .daily, completed: false, lastCompleted: nil),
    Task(name: "daily task 2", type: .daily, completed: false, lastCompleted: nil),
    Task(name: "daily task 3", type: .daily, completed: false, lastCompleted: nil),
    Task(name: "daily task 4", type: .daily, completed: false, lastCompleted: nil),
    Task(name: "daily task 5", type: .daily, completed: false, lastCompleted: nil),
    Task(name: "daily task 6", type: .daily, completed: false, lastCompleted: nil),
    Task(name: "daily task 7", type: .daily, completed: false, lastCompleted: nil)
]

var weeklyTasks = [
    Task(name: "weekly task 1", type: .weekly, completed: false, lastCompleted: nil ),
    Task(name: "weekly task 2", type: .weekly, completed: false, lastCompleted: nil ),
    Task(name: "weekly task 3", type: .weekly, completed: false, lastCompleted: nil )
]

var monthlyTasks = [
    Task(name:"monthly task 1", type: .monthly, completed: false, lastCompleted: nil ),
    Task(name:"monthly task 2", type: .monthly, completed: false, lastCompleted: nil ),
    Task(name:"monthly task 3", type: .monthly, completed: false, lastCompleted: nil )
]
In the cellForRowAt indexPath, for the table view, instead of just having a string instance we will have now a task instance.
func tableView(_ tableView: UITableView, cellForRowAt indexPath: IndexPath) -> UITableViewCell {
let cell = UITableViewCell()
// to hold the current task
var currentTask: Task!
switch indexPath.section {
case 0:
currentTask = dailyTasks[indexPath.row]
case 1:
currentTask = weeklyTasks[indexPath.row]
case 2:
currentTask = monthlyTasks[indexPath.row]
default:
break
}
// use the name property to set the value of the cell.
cell.textLabel!.text = currentTask.name
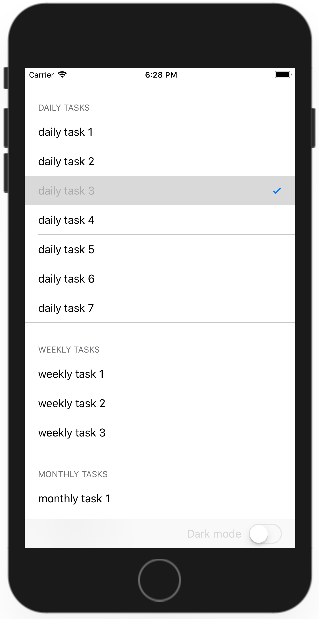
if currentTask.completed {
cell.textLabel?.textColor = UIColor.lightGray
cell.accessoryType = .checkmark
} else {
cell.textLabel?.textColor = UIColor.black
cell.accessoryType = .none
}
// clear out the background
cell.backgroundColor = UIColor.clear
return cell
}
We have also added some additional functionality; if the task is completed, then it should look different in the table view.
You can handle swipe actions in UITableView using the following two methods.
- LeadingSwipeActions
- TrailingSwipeActions
The leading swipe is from the left to the right, and the trailing Swipe is from the right to the left, and these methods were introduced as a part of UITableViewDelegate. Here we need to implement a trailingSwipeActions method.
func tableView(_ tableView: UITableView, trailingSwipeActionsConfigurationForRowAt indexPath: IndexPath) -> UISwipeActionsConfiguration? {
    let completeAction = UIContextualAction(style: .normal, title: "Complete") { (action:UIContextualAction, sourceView:UIView, actionPerformed:(Bool) -> Void) in

        // find the right object and set it to completed
        switch indexPath.section {
        case 0:
            self.dailyTasks[indexPath.row].completed = true
        case 1:
            self.weeklyTasks[indexPath.row].completed = true
        case 2:
            self.monthlyTasks[indexPath.row].completed = true
        default:
            break
        }

        tableView.reloadData()
        actionPerformed(true)
    }

    return UISwipeActionsConfiguration(actions: [completeAction])
}
This method will be called automatically when user swipe from right to left on any task. Let's run your application.
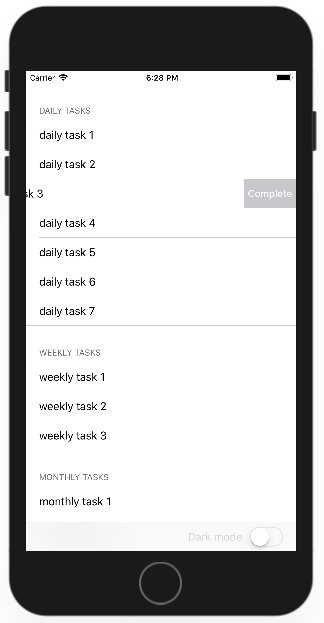
Tap the Complete option on the right side, and it will be marked as completed.